How to Make Homemade Cheez-Its Easily
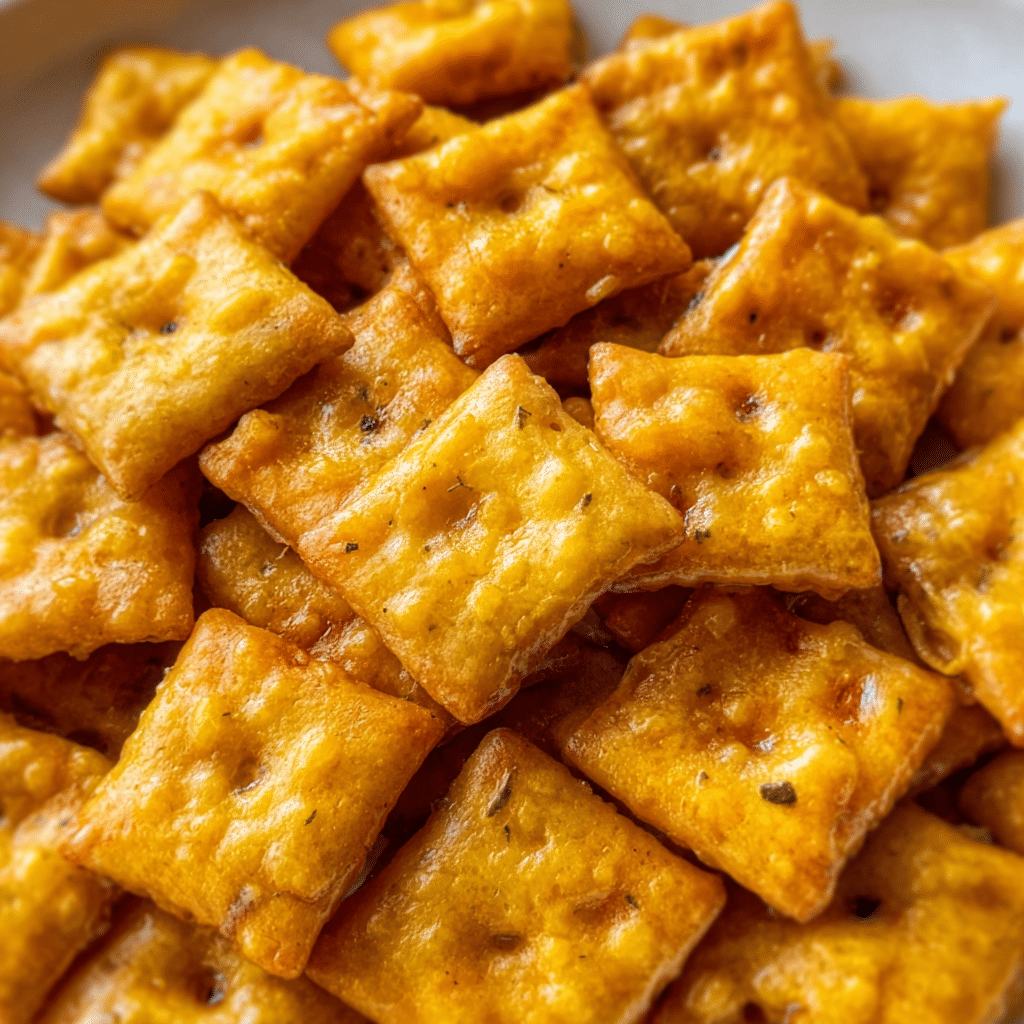
If you’ve ever craved that perfectly crispy, cheesy snack that delivers a satisfying crunch with every bite, then this recipe for Homemade Cheez-Its is made just for you. This easy-to-follow recipe shows you how to whip up these iconic crackers right in your own kitchen using simple ingredients, all while filling your home with the irresistible aroma of baked cheese. Whether you enjoy them as a midday snack, party treat, or just because, these Homemade Cheez-Its are sure to become your new go-to.
Why You’ll Love This Recipe
- Perfect crunch: These crackers bake up crispy and light, just like the classic store-bought version.
- Cheese-packed flavor: Real sharp cheddar gives every bite a rich, savory kick.
- Simple ingredients: You probably already have everything you need in your pantry.
- Customizable recipe: Easy to tweak with spices, cheese types, or dietary preferences.
- Fun and rewarding: Baking these Homemade Cheez-Its is an enjoyable way to create a beloved snack at home.
Ingredients You’ll Need
Gathering simple but essential ingredients is the key to the perfect balance of flavor and texture in your Homemade Cheez-Its. Each component plays a vital role, from the cheese that delivers sharpness to the flour that provides structure and crispness.
- Sharp Cheddar Cheese: Use freshly grated sharp cheddar for that signature cheesy taste and rich color.
- All-Purpose Flour: Provides the structure and crispness required to hold the crackers together.
- Unsalted Butter: Adds depth and helps create the tender yet crunchy texture.
- Garlic Powder: Adds a subtle savory note that complements the cheese beautifully.
- Onion Powder: Enhances the overall flavor with a gentle onion warmth.
- Salt: Balances the flavors and accentuates the cheesiness.
- Cold Water: Helps bring the dough together without making it tough.
Variations for Homemade Cheez-Its
Feel free to put your own spin on this Homemade Cheez-Its recipe! It’s surprisingly flexible, allowing you to adjust it easily for different tastes or dietary needs without losing that signature crisp-cheesy goodness.
- Spicy Kick: Add a pinch of cayenne pepper or smoked paprika for a fiery twist.
- Vegan Version: Substitute vegan cheese and use a plant-based butter alternative.
- Herb Infusion: Mix in dried herbs like thyme, rosemary, or chives for an herbal aroma.
- Different Cheeses: Experiment with Parmesan, Gruyere, or a mix for unique flavors.
- Gluten-Free Option: Swap all-purpose flour for a gluten-free blend suitable for baking.

How to Make Homemade Cheez-Its
Step 1: Prepare the Ingredients
Start by grating your sharp cheddar cheese finely, then measure out your flour, butter, and seasonings. Having everything ready will make the process go smoothly and efficiently.
Step 2: Mix the Dry Ingredients
In a large mixing bowl, combine the flour, garlic powder, onion powder, and salt. Whisk them together so that the spices distribute evenly throughout the dough.
Step 3: Cut in the Butter and Cheese
Add the cold butter and grated cheddar to the dry mixture. Use a pastry cutter or your fingers to work the butter and cheese into the flour until it resembles coarse crumbs.
Step 4: Add Cold Water and Form Dough
Gradually pour in cold water, a tablespoon at a time, mixing gently until the dough starts to come together without becoming sticky. Be careful not to overwork it.
Step 5: Roll and Cut Cracker Shapes
Place the dough between two sheets of parchment paper and roll it out thinly, about 1/8 inch thick. Use a sharp knife or pizza cutter to slice small squares, roughly 1 to 1.5 inches across. Poke a hole in each cracker with a knife or skewer to mimic classic Cheez-Its.
Step 6: Bake to Crunchy Perfection
Lay the squares on a baking sheet lined with parchment and bake at 350°F (175°C) for 12 to 15 minutes, until golden and crisp. Let them cool fully on a wire rack before serving to lock in the crunch.
Pro Tips for Making Homemade Cheez-Its
- Use cold ingredients: Cold butter and water help create a flaky, crispy texture.
- Roll the dough thinly: Thinner dough ensures crispier crackers that aren’t doughy inside.
- Don’t overcrowd the pan: Give crackers space to bake evenly and crisp properly.
- Use sharp cheddar: Strong flavor makes a big difference in that authentic cheesy taste.
- Store properly: Keep Homemade Cheez-Its in an airtight container to preserve crunchiness.
How to Serve Homemade Cheez-Its
Garnishes
For an extra touch, sprinkle your Homemade Cheez-Its with a little sea salt, fresh herbs, or even a light dusting of smoked paprika before baking to boost flavor and visual appeal.
Side Dishes
Pair these cheesy crackers with creamy dips like ranch, guacamole, or a spicy salsa. They also work beautifully alongside soups and salads for added texture and flavor.
Creative Ways to Present
Serve Homemade Cheez-Its in small bowls for casual snacking, mix them into snack blends with nuts and pretzels, or use them as crunchy croutons over salads or casseroles. They also make a fun homemade gift when packaged in decorative jars.
Make Ahead and Storage
Storing Leftovers
Once completely cooled, store Homemade Cheez-Its in an airtight container at room temperature to keep them fresh and crispy for up to two weeks.
Freezing
You can freeze the uncooked dough wrapped tightly in plastic wrap for up to one month. Thaw before rolling and baking whenever cravings hit.
Reheating
If your crackers lose some crispness, pop them in a preheated oven at 300°F (150°C) for a few minutes to revive that fresh-baked crunch.
FAQs
Can I use a different type of cheese besides cheddar?
Yes! While sharp cheddar is traditional, you can experiment with cheeses like Parmesan, Gouda, or Monterey Jack to vary the flavor.
How thin should I roll the dough for Homemade Cheez-Its?
Rolling the dough to about 1/8 inch thick ensures the crackers bake up crispy without being too fragile or doughy.
Are Homemade Cheez-Its suitable for gluten-free diets?
They can be! Use a gluten-free all-purpose flour blend in place of regular flour to make this recipe gluten-free.
Can I make these snacks vegan?
Absolutely! Swap out the cheddar cheese for a plant-based vegan cheese and use a non-dairy butter substitute to make vegan Homemade Cheez-Its.
How long do Homemade Cheez-Its stay fresh?
When stored in an airtight container at room temperature, they stay fresh and crunchy for up to two weeks.
Final Thoughts
Making your own Homemade Cheez-Its is a delightful way to enjoy a classic snack made fresh with love. With just a handful of simple ingredients and a little baking time, you’ll have irresistibly crispy, cheesy crackers that are perfect anytime. So grab your rolling pin and cheese grater—your new favorite snack adventure awaits!
Related Posts
- Why Ham Asparagus Rolls Are Perfect Party Bites
- Best High-Protein Snacks to Power Your Day
- Best Spinach Artichoke Dip Recipes to Try Now

Homemade Cheez-Its
- Total Time: 27 to 30 minutes
- Yield: About 4 dozen crackers 1x
- Diet: Gluten Free
Description
This Homemade Cheez-Its recipe offers crispy, cheesy crackers made from simple pantry ingredients, delivering a rich sharp cheddar flavor and satisfying crunch. Perfect as a snack or party treat, these crackers are easy to customize and bake fresh at home.
Ingredients
Cheese and Dairy
- 1 cup freshly grated sharp cheddar cheese
- 1/4 cup unsalted butter, cold and cut into small pieces
Dry Ingredients
- 1 cup all-purpose flour (or gluten-free all-purpose flour for gluten-free option)
- 1/2 teaspoon garlic powder
- 1/2 teaspoon onion powder
- 1/4 teaspoon salt
Wet Ingredients
- 2 to 3 tablespoons cold water
Instructions
- Prepare the Ingredients: Start by finely grating your sharp cheddar cheese, then measure the flour, butter, and seasonings to have everything ready, ensuring a smooth baking process.
- Mix the Dry Ingredients: In a large mixing bowl, combine the flour, garlic powder, onion powder, and salt. Whisk them together thoroughly to evenly distribute the spices in the dough.
- Cut in the Butter and Cheese: Add the cold butter pieces and grated cheddar to the dry mixture. Use a pastry cutter or your fingers to blend the butter and cheese until the mixture resembles coarse crumbs.
- Add Cold Water and Form Dough: Gradually add cold water one tablespoon at a time, mixing gently until the dough begins to form without becoming sticky. Avoid overworking the dough to maintain a tender texture.
- Roll and Cut Cracker Shapes: Place the dough between two sheets of parchment paper and roll it out to about 1/8 inch thickness. Slice into small squares roughly 1 to 1.5 inches wide using a sharp knife or pizza cutter. Poke a hole in the center of each square with a knife or skewer to mimic classic Cheez-Its.
- Bake to Crunchy Perfection: Arrange the crackers on a parchment-lined baking sheet, giving them space to bake evenly. Bake at 350°F (175°C) for 12 to 15 minutes until they turn golden and crisp. Cool completely on a wire rack before serving to lock in the crunch.
Notes
- Use cold butter and cold water to help create a flaky, crispy texture.
- Roll dough thinly (about 1/8 inch) to ensure crackers are crispy and not doughy inside.
- Avoid overcrowding the baking sheet to allow even baking and crispiness.
- Sharp cheddar provides the best authentic cheesy flavor.
- Store finished crackers in an airtight container at room temperature to retain freshness and crunch for up to two weeks.
- Prep Time: 15 minutes
- Cook Time: 12 to 15 minutes
- Category: Appetizers
- Method: Baking
- Cuisine: American
Nutrition
- Serving Size: 6 crackers
- Calories: 110
- Sugar: 0.2g
- Sodium: 150mg
- Fat: 8g
- Saturated Fat: 5g
- Unsaturated Fat: 2.5g
- Trans Fat: 0g
- Carbohydrates: 7g
- Fiber: 0.3g
- Protein: 3g
- Cholesterol: 20mg
Keywords: cheddar crackers, homemade snacks, crispy cheese crackers, gluten-free snacks, party appetizers, sharp cheddar, crunchy crackers