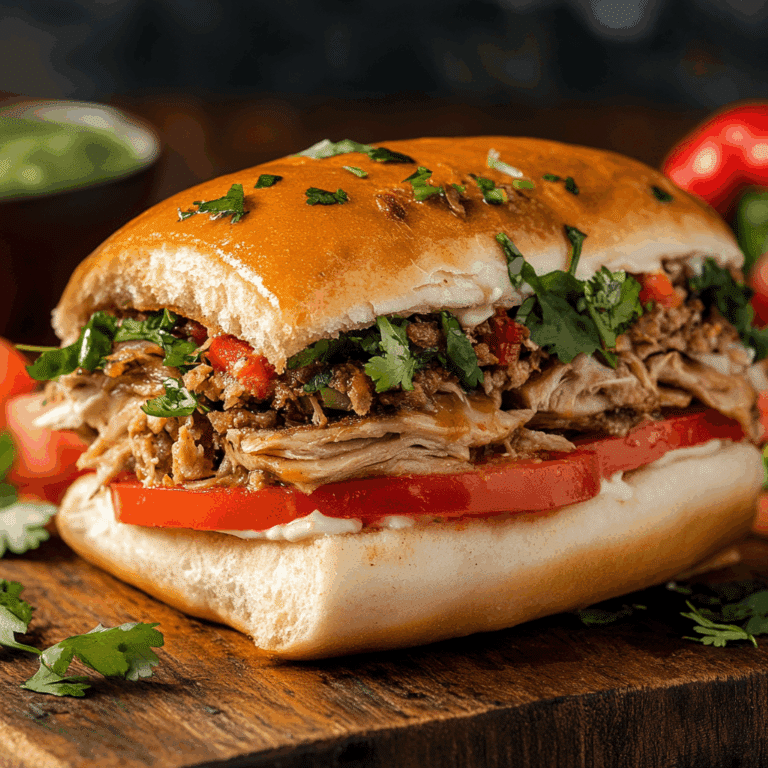
Panini Bread

If you’re craving that perfect crispy yet soft bread for your grilled sandwiches, then this collection of Panini Bread recipes is just what you need. Panini Bread is the cornerstone of any great panini—delivering a crusty exterior with a tender inside that holds up beautifully to all your favorite fillings. Whether you’re making a quick snack or a hearty meal, these recipes are designed to be easy, flavorful, and absolutely satisfying.
Why You’ll Love This Recipe
- Satisfying Texture: The balance of crispy crust and fluffy center is perfect for grilling and biting into, making every sandwich a delight.
- Simple Ingredients: Uses kitchen staples for an approachable recipe anyone can tackle without fuss.
- Versatile Base: Perfect for a variety of fillings, from classic Italian meats to fresh vegetables or vegan options.
- Homemade Freshness: Nothing beats the aroma and taste of freshly baked Panini Bread straight from your oven or grill.
- Meal-Friendly: Ideal for breakfast, lunch, or a light dinner—so you can enjoy it any time of day.
Ingredients You’ll Need
These ingredients are straightforward but essential for creating that perfect Panini Bread. Each one plays a role in developing flavor, achieving the ideal dough consistency, and ensuring a satisfying texture that grills up nicely.
- All-Purpose Flour: The base of the dough, providing structure and chewiness.
- Warm Water: Activates the yeast and combines ingredients smoothly.
- Active Dry Yeast: Essential for the dough to rise and become airy and light.
- Olive Oil: Adds moisture and a subtle richness to the bread.
- Salt: Enhances flavor and balances the dough.
- Sugar: Helps feed the yeast and encourages a golden crust.
Variations for Panini Bread
Feel free to tweak this Panini Bread recipe to suit your mood, ingredients on hand, or dietary preferences. Customizing it is surprisingly simple and keeps your sandwiches exciting every time!
- Whole Wheat Twist: Substitute half the all-purpose flour with whole wheat for a nuttier flavor and extra fiber.
- Herbed Delight: Add dried rosemary, thyme, or oregano into the dough for aromatic, flavorful bread.
- Gluten-Free Option: Use a gluten-free flour blend and adjust the liquid content for a safe, tasty alternative.
- Cheesy Infusion: Incorporate finely shredded Parmesan or mozzarella into the dough for a subtle cheesiness in every bite.
- Garlic Panini Bread: Mix in roasted garlic or garlic powder to give your bread a savory kick.

How to Make Panini Bread
Step 1: Activate the Yeast
Begin by dissolving the active dry yeast and sugar in warm water. Let it sit for about 5-10 minutes until it becomes frothy, which means your yeast is ready to work its magic.
Step 2: Mix the Dough
In a large bowl, combine the flour and salt, then slowly pour in the yeast mixture along with olive oil. Stir everything together until a sticky dough forms.
Step 3: Knead for Perfection
Turn the dough onto a floured surface and knead for about 8-10 minutes until it becomes smooth and elastic. This develops the gluten needed for a great texture.
Step 4: Let the Dough Rise
Place the dough in a lightly oiled bowl, cover it with a damp cloth, and let it rise in a warm spot for 1-2 hours, or until it doubles in size.
Step 5: Shape the Bread
After the dough has risen, punch it down gently, then shape it into oval or rectangular loaf shapes that will fit your panini press or grill.
Step 6: Final Rest
Let the shaped dough rest for another 30 minutes to puff up further, creating that light and airy interior.
Step 7: Bake to Crisp Perfection
Bake the bread in a preheated oven at 450°F (230°C) for about 15-20 minutes, until the crust is golden and crisp. Cool before slicing for your paninis.
Pro Tips for Making Panini Bread
- Temperature Matters: Ensure your water is warm, not hot, to properly activate the yeast without killing it.
- Kneading Is Key: Take your time kneading to achieve the perfect dough consistency—over kneading makes it tough but under kneading leaves it crumbly.
- Proper Rising: Find a warm draft-free place for rising to help the dough double nicely in size.
- Use a Baking Stone: Baking on a preheated stone helps create that characteristic crispy crust.
- Cool Before Slicing: Let the bread cool fully so the crumb sets and slicing doesn’t crush the loaf.
How to Serve Panini Bread
Garnishes
Adding fresh basil leaves, sun-dried tomatoes, or a brush of garlic butter on your finished sandwich brings out extra layers of flavor and color.
Side Dishes
Serve Panini Bread sandwiches with crisp salads, homemade soups, or roasted vegetables for a well-rounded meal that tastes as amazing as it looks.
Creative Ways to Present
Cut into smaller sliders for a party tray, or slice thick and layer with vibrant grilled veggies and colorful cheeses for eye-catching, delicious sandwiches.
Make Ahead and Storage
Storing Leftovers
Wrap leftover Panini Bread tightly in plastic wrap or store in an airtight container to keep it fresh for up to two days at room temperature.
Freezing
Freeze baked Panini Bread by wrapping it well in foil and plastic wrap; it can last up to three months. Thaw overnight in the fridge before reheating.
Reheating
To restore the crispy crust when reheating, pop the bread in a toaster oven or conventional oven at 350°F for 5-7 minutes instead of microwaving.
FAQs
What makes Panini Bread different from regular bread?
Panini Bread has a crusty exterior combined with a soft interior that is sturdy enough to hold grilled fillings without getting soggy, unlike many regular sandwich breads.
Can I use a bread machine for this Panini Bread recipe?
Yes, a bread machine works well for the mixing and kneading stages but shaping and baking are best done by hand in the oven for optimal texture.
How do I know when the bread is fully baked?
The bread should have a deep golden brown crust and sound hollow when tapped on the bottom, indicating it’s perfectly baked through.
Is it possible to make this recipe vegan?
Absolutely! Just ensure the sugar you use is vegan-friendly and substitute olive oil for any butter to keep it plant-based.
Can I make Panini Bread without yeast?
Traditional Panini Bread relies on yeast for texture and flavor, but you can try quick bread variations using baking powder, though the texture will be different.
Final Thoughts
Making your own Panini Bread at home brings so much satisfaction, flavor, and fun to your sandwich game. With these easy-to-follow recipes and tips, you’ll soon be grilling up crispy, flavorful paninis that everyone will love. Give it a try today and taste the difference fresh bread makes!
Related Posts
Print
Panini Bread
- Total Time: 2.5 hours
- Yield: 1 loaf (approx. 8 servings) 1x
- Diet: Vegan
Description
This Panini Bread recipe yields the perfect crispy crust with a soft, fluffy interior, ideal for grilling sandwiches. Using simple, everyday ingredients, it creates a versatile and flavorful bread that holds up well to a variety of fillings, from meats to vegetables or vegan options. Enjoy freshly baked homemade bread that elevates your sandwiches for any meal.
Ingredients
Main Ingredients
- 3 ½ cups all-purpose flour
- 1 ¼ cups warm water (about 110°F / 43°C)
- 2 ¼ tsp active dry yeast (1 packet)
- 2 tbsp olive oil
- 1 ½ tsp salt
- 1 tbsp sugar
Instructions
- Activate the Yeast: Begin by dissolving the active dry yeast and sugar in warm water. Let it sit for about 5-10 minutes until it becomes frothy, which means your yeast is ready to work its magic.
- Mix the Dough: In a large bowl, combine the flour and salt, then slowly pour in the yeast mixture along with olive oil. Stir everything together until a sticky dough forms.
- Knead for Perfection: Turn the dough onto a floured surface and knead for about 8-10 minutes until it becomes smooth and elastic. This develops the gluten needed for a great texture.
- Let the Dough Rise: Place the dough in a lightly oiled bowl, cover it with a damp cloth, and let it rise in a warm spot for 1-2 hours, or until it doubles in size.
- Shape the Bread: After the dough has risen, punch it down gently, then shape it into oval or rectangular loaf shapes that will fit your panini press or grill.
- Final Rest: Let the shaped dough rest for another 30 minutes to puff up further, creating that light and airy interior.
- Bake to Crisp Perfection: Bake the bread in a preheated oven at 450°F (230°C) for about 15-20 minutes, until the crust is golden and crisp. Cool before slicing for your paninis.
Notes
- Ensure your water is warm, not hot, to properly activate the yeast without killing it.
- Take your time kneading to achieve the perfect dough consistency—over kneading makes it tough but under kneading leaves it crumbly.
- Find a warm draft-free place for rising to help the dough double nicely in size.
- Use a baking stone for a crispier crust if available.
- Let the bread cool fully so the crumb sets and slicing doesn’t crush the loaf.
- Prep Time: 15 minutes
- Cook Time: 15-20 minutes
- Category: Appetizers
- Method: Baking
- Cuisine: Italian
Nutrition
- Serving Size: 1 slice (approx. 50g)
- Calories: 120
- Sugar: 1.2g
- Sodium: 210mg
- Fat: 3.5g
- Saturated Fat: 0.5g
- Unsaturated Fat: 3g
- Trans Fat: 0g
- Carbohydrates: 20g
- Fiber: 1g
- Protein: 4g
- Cholesterol: 0mg
Keywords: panini bread, sandwich bread, homemade bread, grilled sandwich bread, easy bread recipe, crispy bread, soft bread