Why Chocolate-Dipped Sugar Wafers Delight Everyone

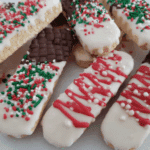
If you’re looking for a delightful treat that combines the perfect balance of crispiness and rich indulgence, Chocolate-Dipped Sugar Wafers are the answer you’ve been craving. This simple yet elegant sweet treat is adored by everyone who loves the crunch of a delicate wafer paired flawlessly with the smooth, melt-in-your-mouth taste of chocolate. Whether as a snack, dessert, or gift, Chocolate-Dipped Sugar Wafers bring joy to every bite and make any occasion a little sweeter.
Why You’ll Love This Recipe
- Perfect Texture Harmony: The light crunch of the sugar wafer paired with creamy chocolate creates an irresistible contrast.
- Simple Yet Sophisticated: Despite being easy to make, these wafers deliver a gourmet taste that impresses every time.
- Customizable Flavors: Swap chocolates or add toppings for a personalized twist on a classic favorite.
- Great for Gifting: Packaged nicely, these treats make thoughtful and beautiful homemade gifts.
- Kid-Friendly Fun: A treat the whole family can enjoy, perfect for parties and celebrations.
Ingredients You’ll Need
Gathering a handful of simple, high-quality ingredients is all it takes to create these chocolate-dipped wonders. Each component is essential — from the crisp wafers that provide that satisfying crunch to the chocolate that adds richness and depth.
- Sugar Wafers: Choose thin, crispy wafers for the best crunch and structure.
- Chocolate: Use high-quality dark, milk, or white chocolate for dipping, which melts smoothly and coats evenly.
- Butter or Coconut Oil: A small amount helps thin the chocolate for easier dipping and enhances shine.
- Optional Toppings: Crushed nuts, sprinkles, or sea salt add texture and flavor contrasts.
- Baking Paper or Silicone Mat: For easy cooling and clean-up of your dipped wafers.
Variations for Chocolate-Dipped Sugar Wafers
Feel free to make this recipe your own! It’s wonderfully adaptable for different tastes and dietary needs, allowing you to experiment with various chocolates, toppings, and techniques to keep things exciting.
- Nutty Twist: Sprinkle finely chopped almonds or pistachios on the chocolate before it sets.
- Flavor Infusion: Add a few drops of peppermint or orange extract into melted chocolate for a seasonal spin.
- Vegan Version: Use dairy-free chocolate and coconut oil to create a plant-based treat everyone will enjoy.
- Double-Dip Delight: Dip once in dark chocolate and a second time in white chocolate to create a marbled effect.
- Spiced Edge: Dust with cinnamon or cayenne pepper for a subtle kick alongside sweetness.

How to Make Chocolate-Dipped Sugar Wafers
Step 1: Prepare Your Workspace
Line a baking sheet with parchment paper or a silicone mat to place your dipped wafers on, ensuring they don’t stick once coated.
Step 2: Melt the Chocolate
Gently melt your choice of chocolate using a double boiler or microwave in short bursts, stirring frequently for a smooth, glossy finish. Stir in a small amount of butter or coconut oil to improve texture.
Step 3: Dip the Wafers
Carefully submerge each sugar wafer halfway or fully into the melted chocolate, letting excess drip off before placing on your lined baking sheet.
Step 4: Add Toppings (Optional)
If desired, sprinkle toppings such as chopped nuts or sea salt on the wet chocolate coating to add texture and flavor.
Step 5: Chill and Set
Place the baking sheet in the fridge for about 15-20 minutes until the chocolate hardens completely, locking in the delicious flavors and crispiness.
Pro Tips for Making Chocolate-Dipped Sugar Wafers
- Choose Quality Chocolate: Using premium chocolate significantly boosts the final flavor and texture of your wafers.
- Don’t Overheat Chocolate: Melt slowly to avoid burning or seizing — patience is key for silky smooth chocolate.
- Dry Wafers Only: Ensure wafers are completely dry before dipping to prevent chocolate from seizing or clumping.
- Use a Fork or Dipping Tool: This makes dipping easier and ensures an even chocolate coating.
- Work Quickly: Chocolate sets fast, so dip and decorate in small batches.
How to Serve Chocolate-Dipped Sugar Wafers
Garnishes
Garnish your Chocolate-Dipped Sugar Wafers with a dusting of powdered sugar or edible glitter for special occasions, or a sprinkle of flaky sea salt to heighten the flavors.
Side Dishes
Serve alongside fresh berries, whipped cream, or a scoop of vanilla ice cream for a complete and indulgent dessert experience.
Creative Ways to Present
Arrange the wafers in a decorative jar, tied with a ribbon as a gift, or stack them in pretty glass jars layered with other treats like nuts and dried fruits for a gorgeous edible display.
Make Ahead and Storage
Storing Leftovers
Keep leftover Chocolate-Dipped Sugar Wafers in an airtight container at room temperature, away from heat or moisture, to maintain their crispness and chocolate shine.
Freezing
These treats freeze well — separate layers with parchment paper and freeze in a sealed container for up to 2 months; thaw at room temperature before enjoying.
Reheating
It’s best to enjoy Chocolate-Dipped Sugar Wafers straight from storage; avoid reheating as it could soften the wafer and affect the chocolate’s texture.
FAQs
Can I use any type of chocolate for Chocolate-Dipped Sugar Wafers?
Yes! Milk, dark, or white chocolate works well, but choose high-quality chocolate for the best taste and smooth dipping experience.
How long do Chocolate-Dipped Sugar Wafers last?
Stored properly in an airtight container, they stay fresh for up to 1 week at room temperature and up to 2 months when frozen.
Can I make these wafers gluten-free?
Absolutely! Use gluten-free sugar wafers and ensure your chocolate does not contain gluten-containing additives to keep the treat safe for gluten-sensitive diets.
What can I use instead of butter to melt the chocolate?
Coconut oil is a great dairy-free alternative that melts smoothly and adds a subtle flavor.
Are Chocolate-Dipped Sugar Wafers suitable for kids?
Yes! These treats are very kid-friendly, but ensure there are no choking hazards from toppings like nuts if serving to younger children.
Final Thoughts
Chocolate-Dipped Sugar Wafers are a wonderful blend of crispy, sweet, and chocolaty perfection that never fails to bring smiles. Whether you want a quick homemade snack, a festive gift, or something special for celebrations, this recipe is sure to impress and satisfy. Dive into the joy of making and sharing this delicious treat today — your taste buds will thank you!
Related Posts
- Irresistible Strawberry Cupcakes with Buttercream Delight
- How to Make Funfetti Cupcakes Perfectly
- Easy Oreo Cheesecake Bites Recipe to Try
Chocolate-Dipped Sugar Wafers
- Total Time: 25 minutes
- Yield: About 20 chocolate-dipped sugar wafers
- Diet: Gluten Free (if using gluten-free wafers)
Description
Chocolate-Dipped Sugar Wafers offer a perfect harmony of light, crispy wafers and smooth, rich chocolate coating. Easy to make yet elegant, these treats are customizable, kid-friendly, and ideal for snacking, gifting, or celebrating any occasion with a deliciously crunchy and chocolaty delight.
Ingredients
Main Ingredients
- Thin, crispy sugar wafers – quantity as desired (e.g., 20 wafers)
- High-quality chocolate (dark, milk, or white) – 8 oz (about 225g)
- Butter or coconut oil – 1 tablespoon
Optional Toppings
- Crushed nuts (almonds, pistachios, etc.) – 2 tablespoons
- Sprinkles – 1 tablespoon
- Sea salt flakes – 1 teaspoon
- Powdered sugar or edible glitter for garnish (optional)
Equipment
- Baking paper or silicone mat – enough to line a baking tray
Instructions
- Prepare Your Workspace: Line a baking sheet with parchment paper or a silicone mat to place your dipped wafers on, ensuring they do not stick once coated.
- Melt the Chocolate: Gently melt your choice of chocolate using a double boiler or microwave in short bursts, stirring frequently until smooth and glossy. Stir in the butter or coconut oil to improve texture and shine.
- Dip the Wafers: Carefully submerge each sugar wafer halfway or fully into the melted chocolate, letting any excess drip off before placing it on the lined baking sheet.
- Add Toppings (Optional): While the chocolate is still wet, sprinkle desired toppings such as crushed nuts, sprinkles, or sea salt for added texture and flavor.
- Chill and Set: Place the baking sheet in the refrigerator for 15-20 minutes or until the chocolate hardens completely, locking in crispness and flavor.
Notes
- Use high-quality chocolate to significantly enhance flavor and smooth texture.
- Melt chocolate slowly to prevent burning or seizing — patience is essential.
- Ensure sugar wafers are completely dry before dipping to avoid clumping issues.
- Use a fork or dipping tool for an even chocolate coating.
- Work quickly in small batches since chocolate sets fast.
- Prep Time: 10 minutes
- Cook Time: 15 minutes (chilling time)
- Category: Dessert
- Method: No-Bake / Chilling
- Cuisine: Universal
Nutrition
- Serving Size: 1 wafer
- Calories: 80
- Sugar: 7g
- Sodium: 15mg
- Fat: 5g
- Saturated Fat: 3g
- Unsaturated Fat: 1.5g
- Trans Fat: 0g
- Carbohydrates: 8g
- Fiber: 1g
- Protein: 1g
- Cholesterol: 5mg
Keywords: chocolate dipped wafers, sugar wafers, easy dessert, gluten free treats, homemade gifts, chocolate snack